Are you looking for a great first sewing project for your kids this summer? Try making DIY Crazy Pillows. Super fun, not too difficult and lots of room for some creativity. You need very few supplies and most will be around your house if you sew very often or craft. Its also a great chance to Up-cycle something.
What you will need for supplies:
Fabric (this can be new or something you would like to cut up and Up-cycle like an old shirt or skirt)
Fiberfill stuffing or old pantyhose, socks,etc...for stuffing
Assorted trims, laces, buttons, ribbon for decorating the top
Thread and a sewing machine
This project has worked very successfully with my private students as well as in classroom situations. These instructions show two of my private students working on the pillows as well as students from All Saint's School's Summer Camp in our "Sew Much Fun" Week 3 Class. If you are interested in taking "Sew Much Fun" with an American Girl Theme in Week 4 or 5, or any of the other wonderful classes, check out Fun in the Sun Day camp here:http://www.asds.org/summer
Step 1:
Cut out two squares of fabric in any size desired. In these photos we used 16" squares.
Step 2:
Pin on your trims to the top square and set aside the other square for the backing. You can see this young girl has only the TOP of her pillow and the BACK is up on the right side. If you accidentally sew both sides together at the same time with the trim, you won't be able to stuff up your pillow! This happens with new seamstresses so be sure to check on them before they use the machines.
Step 3: Hand work: Its great practice to hand stitch the trims in place BEFORE using the sewing machine. You can see both the pink pillow and purple pillow laying out with the trims ready to go. Some students will come up with some pretty "Crazy" pillow designs. Just let them go for it and enjoy the process and creativity. As much as you might want to tell them they have too much trim or it is not linear , just let them do their thing. It is so much more meaningful for them and their parents to know the child made these choices. Later, they may look back with fondness or be totally horrified at their style at the age of 9 or 10 but it's still all theirs!
After the hand stitching is done, Step 4 is sewing on all the trims by machine. The sequined type appliques will need to be hand done completely as the sequins will cause all kinds of havoc with your students and the machines.
Here one of my students in summer camp works on her pillow top. I love the concentration on her face and those tiny cute hands working away like a pro on the machine.
Step 5:
Sew the back of the pillow to the top with the right
sides facing each other. Be sure to leave an opening for turning your
pillow and stuffing it. This is the time to work on pivoting at the
corners. After the entire pillow is sewing all the way around, trim the
corners and turn inside out.
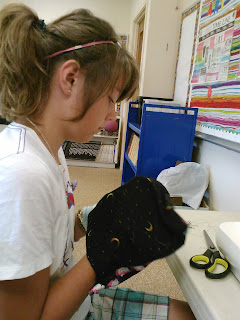
Turning the pillow inside out to get the right side showing is just as easy as turning your t-shirt right side out before getting dressed. Here in this photo, one of the students is turning her pillow and pushing the corners out to make sure her square is nicely shaped.
Fantastic Finished Projects are the end result of the Crazy Pillows. Each one is different and unique.
Making new friends at camp is such a great part of our week. These two little sweethearts model for the camera with their new pillows in hand, and matching pink shirts.
Seriously concentrating on stuffing that pillow nice and full!
This cool pillow is not stuffed yet, but check out the yo-yo flower and button detail on her all black and white creation. Notice another of the yo-yo flowers on her self-made headband too! So pretty.
My wonderful private students show off their finished pillows for the camera. I never have any trouble getting these two to mug it up for a photo.
Audrey (in the hat on the back row, far right) , my daughter and fellow instructor and the students in our Week 3 "Sew Much Fun" class at All Saints Day Schools Awesome Summer camp, Link to Sew Much Fun in Week 4 or 5 at Summer Camp,
If you are a girl who loves sewing, join us for another program next week!


No comments:
Post a Comment